Thursday, October 21, 2010
Eggplant Soup
As I write this, I'm curled up in my pjs, with a heating pad against my back, eating a bowl of soup. Don't be too jealous. Fall has arrived with a vengeance and my back is just aching, so I needed some comfort food and clothing.
I saw this soup recipe last week and was immediately excited. Eggplant's one of my favorite vegetables, and I love soup. I don't know why I didn't look for a soup like this one before.
As much as I was really wanting to make this soup, I was also very afraid of making it. Sometimes eggplant disappoints me. It has so much potential and I love it so, and sometimes it doesn't live up to the hype for me. I know, it's weird. I think it's just that I want it to be perfect every.single.time and sometimes it doesn't work. That scalloped eggplant I made a few months back? Just one example.
How glad I was that this time, my eggplant did not disappoint.
For starters, I mostly just waited for this soup to be done. No dicing of vegetables, just slice in half, roast, and then put together with some broth, cook some more in the pot, and blend the whole thing together. If I had the energt to do it, I might have tried to be productive while it was simmering and done some of the work I brought home with me today. Instead, I did some online Christmas shopping and watched Modern Family and The Middle on my DVR.
Okay, that's kind of productive. I cleaned out some of my DVR...
Anyway, I feel like I could have eaten the entire pot of this. There was all of the taste and virtually none of the work (I totally love those recipes). It was hot, filling, full of flavor and completely different from any kind of soup I'd had before (I totally love that combination). Best of all, it didn't even use up a lot of dishes (I've had a certain someone tell me that I definitely know how to use every pot, pan, and dish in the kitchen to make one dish. It's completely true and I won't lie-I will very often use everything I have and run the dishwasher several times over at the expense of one main course. A good main course, mind you, but still, only one!). I had two sheet pans, two knives, a pot, a ladle, and an immersion blender. By my standards, practically nothing. :)
Though I understand that a lot of people actually don't care for eggplant, I ask that you give this recipe a chance. If it still doesn't sit right with you, I'll give you a brownie from a batch I made on Tuesday night (although I'll admit-you can have one even if you do like it. I did!). The original recipe says to play with the spices, so I did, and I was not sorry. I added in pepper, thyme, and smoked paprika-a spice I think everyone should have in their spice cabinet. I got it based on comments I read from the very website where I found this soup recipe, and I swear I use smoked paprika with just about everything I eat nowadays. If that's not your thing, though, just look through what you have and add some of this or a pinch of that. Keep working on it and taste until you're happy with it!
Eggplant Soup (recipe obtained from The Smitten Kitchen)
3 medium tomatoes, halved (I went with four, because I had just a small one leftover, and you can't just not leave it out!)
1 large eggplant, halved lengthwise (I used 3 small to medium sized ones, as there were no large eggplants at the store)
1 yellow onion, halved
6 garlic cloves, peeled
2 tbsp. olive oil
1 tbsp. chopped fresh thyme or 1 tsp. dried
4 c. chicken broth
1/4 cup heavy cream (optional-I used half and half, as that was what I happened to have on hand)
3/4 cup (about 3 1/2 ounces) crumbled goat cheese (all I had was feta, so I used that instead)
Preheat oven to 400°F. Arrange tomatoes, eggplant, onion and garlic on baking sheets, and don't worry too much about overcrowding. Brush or drizzle vegetables with oil then roast them for 20 minutes. Remove the garlic cloves, set aside, and put the sheets back in the oven for another 25 minutes. Remove from oven and scoop eggplant from skin into a stockpot. Add the rest of the vegetables, the thyme and the chicken stock and bring to a boil, then bring down to a simmer. Cook until onion is very tender, roughly a half hour to 45 minutes later.
If you choose to puree the soup in the blender, try to let it cool down first-I've had the unfortunate experience of hot soup exploding in a cool blender. If you have a hand blender (otherwise known as an immersion blender), you can puree it in the pot while it's still hot (but be careful!). Either way, puree it as chunky or as smooth as you prefer. Season with salt and pepper. Ladle into bowls and sprinkle with either goat cheese or feta cheese.
Tuesday, October 12, 2010
Cider Donuts
Okay, kids. I promised.
Ah, cider donuts. Or, in this case, the ever so elusive cider donut.
Cider donuts remind me of college. About ten minutes down the road from us was this farmstand called Atkins. Oh, how we all loved Atkins. Sometimes our parents would send us care packages from there during finals. Sometimes we'd go there to wander. But always, always, we came out of there with an Atkins cider donut. This past fall, a friend of mine brought me a half dozen, which were promptly consumed (I actually don't think they made it past the next day, actually.). There's also Wilson Farm, a place I hold near and dear to my heart that also makes exceptional cider donuts, and sometimes on the weekend will actually set up a table and make fresh donuts to order-so for about a dollar or two you can eat a hot fresh donut. Heavenly.
For years I've wanted to make donuts. Seriously. Why I never tried before is beyond me-although I probably was worried about how much time it would take to make them. Up until about two years ago, I also didn't have a fryer. I know, I could have used a pot and a candy thermometer, but I never did. Ah well.
This weekend, I decided it was time to go forward and make the little buggers. I got myself some apple cider and set up the dough. I let it chill overnight and yesterday I got to work.
And that's when I realized why I had waited for so long. It is incredibly difficult to make an authentic looking donut. I tried with the first batch and the dough fried itself onto the bottom of my fry basket. The second go-around I just dropped them in the well and let them fry kind of like fritters. Cutting them was a whole other story-it was damn near impossible to get the dough to come out with my circle cutter, so much so that I just wound up dropping spoonfuls in. Some of them were slightly larger than I anticipated, making some donuts the size of my fist. An authentic looking donut these certainly weren't. I also made a mistake with one or two and pulled them out early and set them to dry on a paper-towel lined plate and found later that the inside was still raw, and oozed out. Sigh.
I did wind up with about eight donuts though, and am pleased to say that all hard work and oversized amounts aside, they were quite incredible. Much better hot and fresh, but still okay a day later (I just had one for dessert). With practice, I think these can get much better looking-but the taste is spot-on. Maybe not a Wilson's or an Atkins' cider donut, but pretty damn close.
Cider Donuts (recipe from The Phantom Gourmet)
4 c. flour
1 c. plus ½ c. sugar (separated)
2 tsp. plus 1 tsp ground cinnamon (separated)
2 tsp. baking powder
1 tsp. baking soda
½ tsp. salt
2 eggs
1 c. apple cider
¼ c. milk
2 tbsp. oil
1 tsp. vanilla
¼ c. (4 TB) butter, melted
Canola oil for frying
In a medium sized mixing bowl mix all of the dry ingredients together, save for ½ c. sugar and 1 tsp. cinnamon. In another bowl whisk the eggs, then add all of the remaining wet ingredients. Combine the wet and dry ingredients together and mix well to create a thick dough. Line a baking dish with parchment paper, and evenly spread the dough into the dish. Cover the pan and refrigerate overnight. Mix the remaining ½ cup sugar and 1 tsp cinnamon, and set aside for rolling the donuts after they are cooked.
When ready to cook the donuts, heat an inch or two of oil in a medium sized saucepan or a deep fryer to about 360F. Cut donuts using a knife or a circular cutter, or even scoop it using an ice cream scoop, and carefully place in the oil. Fry for about 90 seconds to 2 minutes per side or until golden brown. Drain on paper towels, roll in cinnamon sugar, and eat up!
Sunday, October 10, 2010
Pumpkin Chocolate Chip Cookies
It's fall. I love fall-related recipes. Bring on the pumpkins, apples, and cranberries!
This recipe has been a long time coming. A friend of mine from high school saw a picture of these a long while ago (last Christmas, I believe), and asked me for the recipe. I told her of course, it would be posted on the blog soon.
Does "soon" count if it's within a year? Then if so, I'm golden.
At any rate, this is one of my very favorite cookie recipes. It's really hard to screw up, for one. For two, it's great for fall, with all the pumpkin, and really makes me feel like curling up on the couch in front of the fireplace with a bunch of them and a hot cup of coffee. Thirdly, there's the perfect amount of chocolate all tied into a very neat little package. As it turns out, I felt the need to make them and bring them to work. I swear I never saw cookies disappear so quickly.
The weird thing about these are that they are so soft. Like Toll House Soft Baked soft (are those even carried anymore in stores or have they been discontinued?). They have a bread or cake-like consistency and the addition of chocolate chips sends them straight over the edge. I will go so far to say that I will always choose this over my beloved chocolate chip.
Okay, almost always. But the ease of this recipe combined with the sheer desire to inhale the entire batch in one sitting makes the pumpkin chocolate chip cookie incredibly difficult to resist. If you make them, set aside one or four for me, okay?
Pumpkin Chocolate Chip Cookies (recipe obtained from boston.com/food)
2 1/2 c. flour
1 tsp. baking soda
1 tsp. baking powder
1 tsp. ground cinnamon
1 tsp. ground nutmeg
1/2 tsp. salt
1/2 c. (1 stick) unsalted butter, at room temperature
1 1/2 c. sugar
1 c. canned pumpkin puree
1 egg
1 tsp vanilla extract
1 bag (12 ounces) semisweet chocolate chips or chunks
1/2 cup walnuts or pecans (optional-I never find I need them!)
Preheat the oven to 350 degrees. Mix together the flour, baking soda, baking powder, cinnamon, nutmeg, and salt in a bowl and set aside.
Cream the butter and sugar together using an electric mixer on medium speed until fluffy. Add the pumpkin, egg, and vanilla and beat just until blended. Then mix in the dry ingredients.
With a spoon or a spatula, stir in the chocolate chips or chunks and nuts, if using. Do not use the mixer to do this task (I promise. I almost broke my mixer once trying that stunt.)
Line baking sheets with parchment paper. Drop the batter by heaping tablespoons 1 inch apart on the baking sheets.
Bake the cookies for 13 to 15 minutes or until lightly browned. Let the cookies cool on the sheets for a few minutes before transferring to wire racks to cool completely.
Sunday, September 12, 2010
Potato Frittata
I found this recipe a few weeks ago, and have been itching for a good morning to try it for brunch. The problem lies in the fact that most mornings I'm not home to make brunch, let alone enjoy it. I leave for work every weekday morning before 7, on Saturdays I've been trying to get to the barn which means I need to leave the house no later than 10:30, and Sundays I'm working at the gym at 9. See what I mean? The only brunches I'll be having for awhile will be at places like The Restaurant or Ball Square Cafe. If I make it myself I'd be having brunch at 4 PM.
For some reason, I decided I had to have breakfast for dinner tonight. Again. I'm not ashamed to admit it. I knew immediately I had to make this particular dish(if for no other reason than I needed to use my potatoes and I needed to clear out some eggs from the fridge). I couldn't wait for this.
This meal is So.Perfect. It has all my favorite ingredients-eggs and potatoes and caramelized onions-and based on recommendations from the original recipe, I added 3 slices of crumbled, cooked bacon on top while it baked. It smells awesome in here. I'm pretty sure I heard the Comcast guy's stomach rumble while he fixed my cable connection-I almost felt bad.
(By the way, did you know that Comcast will come out for repairs on Sundays? It's amazing. No more need to take off a half day to wait for them to show! It has made my day that much better.)
This meal is simple, easy to throw together, and goes well with nearly everything. I'd say try a nice salad but quite honestly I was perfectly happy eating it on its own!
Potato Frittata (recipe from Joy the Baker)
5 Tablespoons canola oil, divided
1 small yellow onion, thinly sliced
4 large russet potatoes, peeled and sliced about 1/8 inch thick (a mandolin is great for this if you have one)
3 Tbsp. unsalted butter
Salt and Pepper
7 large eggs
2 Tbsp diced flat-leaf parsley
2 Tbsp. diced chives
2 Tbsp. heavy cream
Preheat oven to 400 degrees.
Heat a skillet over medium high heat and put in 2 Tablespoons of the canola oil. Add the onions and cook until caramelized, roughly about 8 to 10 minutes. Make certain to not burn the onions and make sure the onions are all roughly a uniform brown color.
Toss the onions with the raw sliced potatoes in a roasting pan (I used a glass pyrex dish, in case you needed a reference!). Add 1 tablespoon of butter and the remaining 3 Tablespoons of oil and toss together in the pan. Season generously with salt and pepper. Cover the pan with foil and bake for 25 to 30 minutes or until the potatoes are tender, and then set the potatoes aside to cool for 15 minutes. Reduce the oven heat to 350 degrees F.
Before the potatoes are done, whisk the eggs, herbs and cream together in a bowl. Season with salt and pepper.
Heat a 10-inch cast-iron skillet over medium high heat. Grease the skillet with the remaining 2 Tablespoons of melted butter. Add the cooked potatoes to the pan, and combine with the egg mixture. Cover the skillet with foil and bake for 30 minutes. Remove the foil and bake for 10 minutes more. (**I adapted this, because although I do have a cast-iron skillet, I also have a glass-top stove, which means many cast-iron skillets are a no-no. I adapted this by using a pyrex glass pie pan instead, and this worked just fine. Whatever you have will be fine as well-no need to go out and get a cast-iron skillet for this-although I will say that I think everyone should have cast-iron in the kitchen somewhere!)
Enjoy for Sunday dinner, Monday breakfast, or Tuesday lunch. Heck, enjoy it for all three!
Wednesday, September 8, 2010
Blueberry Boy Bait
I am a huge sucker for fruit. Any type of fruit. I have been known before to buy fruit that's out of season at a ridiculously high markup because I need to have it in my cereal, I have to be baking with it, or I need it to complete my lunch. Sometimes, frozen fruit just won't cut it for me.
Okay, this probably makes me sound crazy. But you need to keep this in mind, with blueberries being pretty much out of season right now. You will still want to make this with fresh, not frozen, blueberries. You could make it with frozen berries, but I just don't think it'll taste the same. But that's just me. With that being said, it would probably be okay with any type of berry-it's a versatile cake. You may even be able to get away with substituting some sort of chocolate, if that's your thing. Hell, it's gearing up to be fall-I bet this would be great with cranberries.
I digress, because I made this recipe awhile ago. I neglected to post it at the time because I wasn't sitting down long enough at my computer to be able to post it-which is a good thing. Between the fact that I got a new job that so far is awesome and have been hanging out with excellent company and having fun adventures, it's good that I haven't been posting. This, I'm sure, leads you to your next question: why am I posting today, in the middle of the afternoon?
Well, it's simple, really. I'm feeling lousy, have been home sick from work the past few days, and just woke up from what seems like a two day nap (no, really, I've actually been sleeping on and off solidly since Monday night) and in an effort to keep from boredom and also try to get myself back on a regular sleep/wake schedule (and hate myself in the process, because I really am aching to go back to sleep right now), I've been looking through old pictures and found ones that were supposed to go with this blog post. Since my appetite is less than stellar at the moment I figured the least I could do was feast with the eyes rather than my stomach, although I do very vividly remember this being outstanding when I made it.
I was told at the time that I made this that the name of this dessert was unnecessary, for I already have the boy, deeming 'bait' unnecessary. Fair enough, but that's what the dish is called, so that's what this post is titled.
This recipe reminds me very much of that buttermilk cake I posted about a few months ago. Very lush cake, with so very much butter.
I'm telling you, Mom would be proud of the butter that went into this.
I wish I could show you pictures of what it looked like after it was cut into, but I can't, because the entire thing just...disappeared. Evaporated into thin air. Crumbs and all.
I guess it's the sign of a good dessert.
It is the kind of dessert that you have to be careful of. Because if you're not careful, the thing will just sneak up on you. No lies, friends. It is amazing. And amazingly addictive. I love this because it's almost as fun to make as it is to eat.
Blueberry Boy Bait (recipe obtained from www.smittenkitchen.com)
2 c. plus 1 tsp. all-purpose flour
1 tbsp. baking powder
1 tsp. salt
2 sticks of softened unsalted butter
3/4 c. packed light brown sugar
1/2 c. granulated sugar
3 eggs
1 c. whole milk
1/2 c. blueberries, fresh or frozen (I prefer fresh wherever possible.)
Topping
1/2 c. blueberries, fresh or frozen (do not defrost)
1/4 c. granulated sugar
1/2 tsp. ground cinnamon
Preheat oven to 350 degrees. Grease and flour a 13 by 9-inch baking pan.
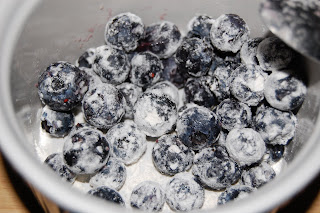
Mix two cups flour, baking powder, and salt together in medium bowl. With an electric mixer, beat butter and sugars on medium-high speed until fluffy, roughly about two minutes or so. Add eggs, one at a time, beating until just incorporated together. Reduce speed to medium and beat in one-third of flour mixture until incorporated and then beat in half of milk, and continue in that fashion, ending with flour. Combine the blueberries with remaining one teaspoon flour. Gently fold 1/2 c. of blueberries in the batter. Spread batter into prepared pan.
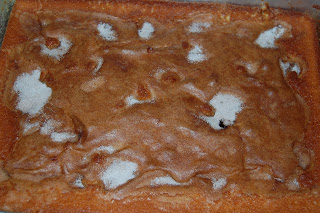
Scatter the remaining blueberries over top of batter. Stir sugar and cinnamon together and sprinkle over the cake. Bake until toothpick inserted in center of cake comes out clean, 45 to 50 minutes. Cool in pan 20 minutes, then place on serving platter with the topping side up. If it even makes it out of the pan... :)
Wednesday, August 18, 2010
Scalloped Tomatoes
I know what you're thinking. Scalloped doesn't go with tomatoes, it goes with potatoes.
(I also know all of you are all "what? two posts in a row?" Indeed, friends, it is true.)
In honor of a tomato festival that's happening at Wilson Farm this weekend, I thought it appropriate to post about a recipe I actually made a few weeks ago, but only decided to post tonight. I really shouldn't have waited, though I guess if I didn't wait, some of you might have asked me to share.
This dish, I couldn't share. This one was all mine.
I have never had a dish like this. It was simultaneously fantastic, light, and flavorful. I liked that there weren't too many steps to it, and that it was something that was interchangeable: I ate it with some chicken for dinner, then had it with a poached egg the next morning for breakfast.
Sometimes, I'll get sick of eating the same leftovers day after day until I get rid of them. This was one dish that I actually felt sad about scraping the bottom of the pan and polishing off. I loved, loved, loved this dish. I'm contemplating making an extra one and freezing it for later. I loved how the basil stood out and made an appearance, complimenting the tomatoes perfectly (basil and tomatoes just work together, anyway). Best of all, I loved how I could eat it for days and it would just get better with each meal.
Do not wait. Do not pass go until you have cooked this dish. You will absolutely not be sorry.
Scalloped Tomatoes with Croutons (recipe found on the Smitten Kitchen website)
3 tbsp. olive oil
2 c. bread from a French-like boule bread, in a 1/2-inch dice, crusts removed-if you have extra, that's okay!
2 1/2 lbs plum tomatoes, cut into 1/2-inch dice
3 cloves garlic, minced (about 1 tbsp.)
2 tbsp. sugar
2 tsp. salt
1 tsp. black pepper
1/2 c. thinly slivered basil leaves, lightly packed
1 c. freshly grated Parmesan cheese
Preheat the oven to 350°F. Heat olive oil in a large skillet over medium-high. Add the bread cubes and stir so that they are evenly coated with oil. Cook cubes until toasty on all sides, roughly about 5 minutes.
Combine tomatoes, garlic, sugar, salt and pepper in a large bowl. When the bread cubes are toasted, add the tomato mixture and cook them together, stirring frequently, for 5 minutes. Remove from heat and stir in the basil. Pour into a shallow pan and top with Parmesan cheese. Bake 35 to 40 minutes until the top is browned and the tomatoes are bubbly. Serve hot or warm.
Zucchini Bread
Let's talk bread for a minute.
Sweet breads are one of my favorite things to make and eat. For one, they're pretty hard to mess up, and for two, they're incredibly easy. I had seen this recipe quite a few weeks ago, and bookmarked it to make on a rainy day (or at least a cooler one!). I waited. And waited. And waited. Of course it didn't cool down quite enough for me to feel comfortable turning on the oven. I figured I'd have to hold off on this recipe, that is, until a friend of mine sent me an email one day. The email had the subject "This looks good!" and in it was a recipe.
The same recipe I had bookmarked several weeks prior.
(said friend sends me recipes every now and then, since she knows I'll typically try them pretty quickly after reading it. In this particular case, I suppose great minds were thinking alike.)
This weekend, I decided I'd go ahead and make the bread. It cooled off outside just enough for me to justify turning on the oven to do something other than dinner, and I also had several zucchinis sitting in the refrigerator begging to be used. How could I not?
I've never tried to make zucchini bread before, but I remember my sister a few years ago made chocolate zucchini bread, and it was pretty tasty, so I was game to give this one a shot. It was incredibly moist and quite good, if I do say so myself. I've never put yogurt in a bread before, and never yogurt and applesauce in at the same time, but I do think it made a world of difference. I brought this bread to work the next day, and by the end of the day found only crumbs and my coworkers saying "was that bread from you? Will you make it again?" Success.
Next time, I might branch out and make it with cranberries. Or chocolate (because everything's better with chocolate). Or maybe even both. The possibilities are endless!
Zucchini Bread (recipe from the Whole Foods Market website)
1 1/2 c. whole wheat pastry flour (I didn't have pastry flour, so I used regular whole wheat flour. I didn't notice any difference)
1/2 tsp. salt
1/2 tsp. baking soda
1/2 tsp. baking powder
1 tsp. ground cinnamon
1/2 tsp. ground nutmeg
1 egg
1/3 c. canola oil
1/3 c. unsweetened applesauce
2 tbsp. nonfat plain yogurt (I used greek yogurt)
3/4 c. sugar
2 tsp. vanilla extract
1 c. grated zucchini
1/3 c. finely chopped walnuts
Preheat oven to 325°F. Grease an 8 inch loaf pan and set aside.
In one bowl, mix together flour, salt, baking soda, baking powder, cinnamon and nutmeg. In another bowl, whisk together egg, oil, applesauce, yogurt, sugar and vanilla. Add flour mixture and stir until well combined. Fold in zucchini and walnuts. Transfer batter to prepared pan and bake until a toothpick inserted in the middle comes out clean and the bread is golden brown, about 50 to 60 minutes.
See what I mean? Easy peasy, and good too! :)
Monday, June 28, 2010
Blueberry Angel Muffins
I got a new cookbook last week. It was like Christmas morning when the package from Amazon.com arrived.
I know, I get excited about cookbooks. I like to think I enjoy the little things.
The reason why I got excited about this cookbook was a recipe I saw in it that was showcased on Boston.com's food page last week, for Blueberry Angel Muffins. I read it, clicked the links to see the cookbook, and proceeded to get so hungry, and so excited over the prospect of making such tasty sweet treats that I ordered the book on the spot. I *never* do that (no, really. I often take the easy way and google the recipe instead). The pictures looked so good though, and the recipes looked even better, that I just couldn't resist.
Last week, during a particularly hot and humid day, I went to work.
It was an uncomfortable day to bake, but damn, if I wasn't determined.
And damn, was I not disappointed. These muffins were so different, but so awesome. They tasted like little angel food cakes. They were light and airy, not really the way a muffin usually is! I'll admit I've never made a meringue to go into muffins. It is more like a dessert than a breakfast. But not to worry-I ate them for both meals, so they're versatile. :)
My only concern was that I ran out of blueberries in the middle of this, so I had to add in a few raspberries, so they became a bit tart. Blueberry-raspberry is certainly a flavor of choice, but I was not intending for them to be that way, which is why the pictures don't necessarily add up to the recipe. Feel free to add whatever fruit you would like!
All told, this is the perfect summer dessert. Or breakfast. Or snack.
Blueberry Angel Muffins (recipe obtained from "The Perfect Finish: Special Desserts for Every Occasion" by Bill Yosses and Melissa Clark)
2/3 c. cake flour
1/2 c. confectioners’ sugar
1/4 tsp. salt
1 1/4 c. fresh blueberries
2 tsp. vanilla extract
8 egg whites, at room temperature
Pinch of cream of tartar
1/2 c. granulated sugar
Grated rind of 1 lemon
Extra sugar (for sprinkling)
Preheat the oven at 375 degrees. Line 18 cups in 2 muffin tins with paper cups.
In a separate bowl, mix the cake flour, confectioners’ sugar, and salt.
In another bowl, toss the blueberries and vanilla.
Beat the egg whites and cream of tartar using an electric mixer on medium-low speed until frothy. Add 1 tablespoon of the granulated sugar and continue to beat at medium speed until you get soft peaks to form. Beat in the remaining 1/2 cup of granulated sugar, and raise the speed to high. Beat until the mixture forms stiff peaks.
Sprinkle the flour mixture and lemon rind on the egg whites. With a rubber spatula, fold them in, working carefully to avoid deflating the whites. Fold in half of the blueberries. Then fold in the other half.
Divide the batter among the muffin cups so that each one is 2/3 full. Place a few more blueberries on top of each muffin (or fruit of choice-I used a raspberry on top for each muffin) and sprinkle each with a little more granulated sugar.
Bake in the center of the oven for 20 to 25 minutes or until the muffins are lightly golden. Cool on a baking rack.
Sunday, June 27, 2010
Cheese Whizzers
This one was interesting.
So back around Easter time (I know, I'm backtracking myself), I got a call from my dad. At family holidays we are all always assigned a dish-whether appetizer, side, or dessert. This year I was assigned a side dish (green bean casserole) and an appetizer (guacamole-see, I told you-that guac comes out for *everything*). Well, that was what I was assigned until I got a phone call from dad, about Tuesday prior to the big holiday. He started off by saying, "do you remember about the cheese whizzers?"
um, no.
"Your mother used to make these things called cheese whizzers, and they're really great. It's bread and cheese whiz, wrapped in bacon. You don't remember them?"
um, no.
"Well, I've been thinking about those a lot lately. I used to love those. Maybe you can look through the recipes you have of hers and maybe make those for Sunday too? I mean, no big deal if you can't, but I really liked those..."
That's code for "Please, I've had a craving for these things, bring them on Sunday and you'll get the status of 'favorite child'" (apologies to my sister).
So, that weekend, I made cheese whizzers. It was most interesting. It really was as my dad had said: Bread, cheese whiz, all wrapped in bacon, and then broiled in the oven. It tasted like a grilled cheese in bacon. Very tasty, and I can understand both a) why my dad likes it so much-I mean, come on! The thing has cheese and bacon! What's not to like? and b)why he doesn't have it anymore-the thing is made with cheese whiz! and bacon! I can feel my arteries clogging on the thought alone. On the other hand, having it once in a while won't kill you. It's a good appetizer, and pretty simple to throw together. Have some for your next barbecue, or for your next family gathering. Then make sure your dad remembers it and asks you to make it again 20 years later.
Cheese Whizzers (origins of recipe unknown, credit for directions and ingredients go to my dad)
One loaf of soft white sandwich bread
One jar of cheese whiz
One pound of thick center cut bacon
Take a slice of soft sandwich bread and roll it with a rolling pin until flattened. You should then be able to slice it into three long strips (lengthwise).
Spread a thin layer of cheese whiz on each strip, then roll each strip up.
Take a slice of bacon, and cut it in half. Wrap a half strip around each sandwich roll, and secure with a toothpick.
Repeat until all the bread and bacon have been used. It's entirely possible you'll have a good amount of cheese whiz left.
Broil the cheese whizzers until bacon is golden and cooked. Check early and often so that it doesn't burn. I have no time frame for this, as each oven is different, but make sure you continue to check!
Subscribe to:
Posts (Atom)