Sunday, October 30, 2011

"Peanutella"

If you don't know my favorite candy, you may not know me all that well.

...

...

still thinking?

I'm a gigantic sucker for the chocolate peanut butter combination, so your guess of Reese's Peanut Butter Cups is spot on.
(I'm actually eating one now.)

On Halloween, I've gone trick-or treating with my nieces and my sister since they've been old enough to go. One year, quite awhile ago, I told my nieces this little secret of my favorite candy. Ever since, every year, they'll help me in my quest for peanut butter-chocolate euphoria.

"Auntie!" They'll shout, from the lucky houses. "They had Peanut Butter Cups! I got one for you!"

At Halloween, my pockets are stuffed with peanut butter cups and a few wrappers, from those I ate while I walked. I clean up at Halloween.

Today seemed like a perfect day to make this spread: Woburn had it's official Halloween parade this afternoon, we had an unusual freak nor'easter that produced several inches of snow, and I'm procrastinating from doing paperwork at home. I'm also trying to avoid breaking into the bag of peanut butter cups I bought for trick-or-treaters tomorrow. See? Win-win.


This was one of the weirder recipes I've ever made. Put toasted peanuts in the food processor and grind until it looks like peanut butter. Weird. Add cocoa powder and powdered sugar and salt and oil and blend until it looks like a spread. Too easy. Spread it on a piece of toasted challah bread shipped to you from your favorite island bakery. So very right.


Chocolate-Peanut Spread (recipe from Smitten Kitchen)
2 c. shelled and skinned peanuts (the recipe calls for raw; all I could find were salted and roasted. Those are fine too)
1/2 c. unsweetened cocoa powder
1 1/4 c. powdered sugar
1/4 tsp. salt (if you find unsalted peanuts, you may need more)
2-3 tablespoons peanut oil

Turn the oven to 400 degrees. Spread the peanuts evenly over a cookie sheet and roast for about 10 minutes, or 5 if they are already roasted.
Transfer the peanuts to a food processor (I'm fairly certain this wouldnt work with a blender, sadly, but if you try let me know how you make out) and grind them for about 5 minutes. It will first look really grainy, then it will have more of a peanut butter look. Leave it alone until it looks like peanut butter and then grind it for another minute or so, just to be sure.

Add the cocoa, sugar, salt and two tablespoons of the oil to the food processor and continue to blend together for about 1 minute.

Refrigerate until ready to use.

Wednesday, June 22, 2011

Goulash


I know that this recipe is not completely authentic. I am well aware that goulash is a Hungarian dish (right? Someone back me up on this) and I'm fairly certain that the real version does not contain Velveeta. In fact, I'm not sure that goulash contains cheese at all, but I digress. This is the name of the dish I know, and that's what sticks. It's like fat pie. Or oreo balls. You don't try to fix what isn't broken.

I grew up on goulash. My dad made it quite often on the weekends, and I'm not sure if it was because it was a) filling, b)fast, c) extremely tasty, or d) all of the above. At any rate, every time I eat it, I'm reminded of eating this on blue plastic plates, with a little bit of toasted french bread on the side. Sometimes a salad too, because, well, it made us all feel like we were eating somewhat healthy. This is something that very much reminds me of my childhood.

As adults, my dad will still make this dish for us on rare occasions. I wonder if it's because his wife won't let him have it on his own, but I'm glad he'll wait for me to come up there to make it. Awhile back I asked him how he did it. He replied, "I just brown meat, saute an onion, add some velveeta and sauce, a pound of pasta, and frozen peas."


(my father is the king of simplicity when it comes to food. Remember these?)

I made him write it down, since I didn't want to leave room for error the first time I tried it for myself, but it really is as easy as it sounds. It's pure comfort in a bowl. It's great in the wintertime, but I'll eat it any time of year. Like tonight, when it's pouring rain out.


These days, it's gotten several requests. We have switched it up a bit, substituting ground chicken or seasoned ground turkey, whole wheat pasta, and most recently we added red peppers and mushrooms. This is a fun dish to play with.


You really ought to try this. Especially if you're short on time. It's awesome. Everyone who's tried it has given this dish it's due. Go on. You won't be sorry.

Goulash (recipe courtesy of my dad)
1 lb. meat (I grew up on ground chuck. Nowadays, I'll try turkey or chicken-dare I say it tastes almost better than ground beef?)
1 onion, finely diced
1 lb. pasta (the recipe calls for angel hair-I've also made it with fettucini and it's just as good)
a small spoonful of minced garlic
1 jar of Ragu sauce (pick whatever variety you prefer most)
1 box of frozen peas
1/3 block of Velveeta cheese (we use almost a half block these days, because we like more cheese. I once totally forgot and used an entire block. Not only did it just make it totally uncooperative to mix together, it was really unappealing for leftovers. Use judgement, but if you prefer more cheese, stick with measurements closer to a half block.

Saute the onions in a pot for several minutes over medium to medium high heat. Add the meat and brown all over. Drain the liquid well, then return the pot to the stove.

In the meantime, cook a pound of pasta according to the directions on the box. Drain well, then add to the meat mixture.

Put the entire jar of sauce into the pot. Put the frozen peas in the mixture at this point as well. While the goulash is heating through (continue to mix well) add the Velveeta in small chunks so it melts easier and faster. Mix until fully incorporated together, then serve it in bowls. Or hell, just take a fork to the pot. You may save some dish washing that way.

Saturday, June 18, 2011

Lemon Blueberry Pancakes


I decided to make these pancakes this morning for a lazy Saturday breakfast (well, it was almost lunch when we finally ate them. Ah well.). Adam took one bite of these, declared them "so good you don't need syrup" and then suggested to me that I should post these on the blog.

Ask, and ye shall receive.


I've spoken before about lemon pancakes. How I kind of felt them to be a little too tart for my taste. I tried making meyer lemon pancakes and found them to be much better, much more subtle. And then there were the lemon blueberry pancakes. I'm still not sure why lemons and blueberries match so well together, but yet, there they were, a perfect pair. Another thing that was great about it was that the blueberries were directly in the batter, something I've admittedly never tried. I've always put the blueberries in as they bake on the griddle. Never again.

This recipe calls for evaporated milk, and like an idiot, when I went to the store I bought sweetened condensed milk instead. Figuring that this might make the pancakes overly sweet, I decided to ditch the condensed milk and use up some leftover buttermilk I had in the fridge. It worked like a charm. We decided that they seemed crepe-like...but maybe a touch thicker. Next time I try these, I'd like to mix it up and try different things: evaporated milk, sour cream, maybe even yogurt!


I thought that maple syrup might overpower these pancakes and that it might make them too sweet. I thought that I might need my raspberry syrup to continue with the fruit theme. I don't know, maple syrup and lemon seemed weird to me. But it worked. I loved it. Let's be honest anyway: Maple syrup (REAL maple syrup, not that fake Aunt Jemima stuff) is the best thing known to man. Of course it would make these pancakes even more awesome.


We ate all of the pancakes in one sitting. Clearly a win-situation for us, and a first when it comes to pancakes. Though I might need to go outside for a run after doing that. :)

Lemon Blueberry Pancakes (recipe adapted from The Pioneer Woman)
1-½ c. cake flour, plus one additional TBSP
¼ tsp. salt
1 T. baking powder
3 T. Sugar
1-½ cup Evaporated Milk (I didn't have it, so I substituted buttermilk instead)
1 lemon
1 large egg
1-½ tsp vanilla
2 T. melted butter
Zest From 1 lemon
1 heaping c. Blueberries

Heat heavy skillet or grill over medium low heat.
In a medium bowl, mix flour, salt, baking powder, and sugar together. Set aside.
In a separate bowl, mix evaporated milk, juice of 1 lemon, and lemon zest. Sit aside for five minutes, then add egg, vanilla, and melted butter. Mix to combine.
Pour wet mixture into dry ingredients. Stir gently to combine. Stir in blueberries. Make sure mixture isn’t overly thick. If it is, add more milk, buttermilk, or whatever liquid you might be using.
Melt butter in heated skillet. Flick some water over the top to see if it's ready (water should dance across if it is). When the skillet is ready, ladle batter in 1/3-1/4 c. amounts, and fry for about 3 minutes a side, or until golden brown, whichever comes first. Add butter to the top and douse in copious amounts of maple syrup.

Sunday, June 5, 2011

Berry Buttermilk Sherbet


It's now starting to be summer in New England, and summer for me equals ice cream.

There's a place about a mile down the road from us called Breakers. They serve Richardson's ice cream, and I will, without fail, order one of two things there: a black raspberry frozen yogurt with chocolate sprinkles or a chocolate peanut butter ice cream (for those who read this blog and know me very well, not to worry-my favorite ice cream ever, coffee oreo, isn't as good there as it is at JP Licks, so I don't get it.). Their sizes are gigantic-so gigantic that we typically order kiddie sizes, which in the real world are closer to mediums. It's a ton of ice cream for under $4. We love going there, especially in the summer.

A few years ago, I found a refurbished ice cream maker on Amazon for very little money. I was thrilled-I could make ice cream at home! I began making vanilla, chocolate, and yes, even coffee oreo. I made mint chip and an at-home version of Crantucket (vanilla with chocolate covered cranberries that my favorite ice cream place on Nantucket serves). I've done some sorbets and sherbets too-I made a mango sherbet for Adam's birthday this year and a mango-raspberry sorbet a few months ago. I found this recipe for a berry sherbet yesterday, and couldn't wait to try it.


The thing about this sherbet that makes it different for me is that it includes buttermilk-something that makes this dessert be a little more tangy and tart than I'm used to. It also has the option to strain the seeds or not-something I decided to do with it tonight. Though it made the sherbet more creamy, I don't know if I'll do that every time. It does take quite awhile to strain the mixture completely of seeds-I did it in roughly 25 minutes, so if you don't mind, keep it in-you'll get sherbet much faster.


This is a really good sherbet. I loved the tang, I especially loved the colors, and I loved that it was made with fresh berries. It made a really good weekend even better. If you have an ice cream maker, I'd suggest you get on this recipe right away-otherwise, come hang out with me before it disappears :)


Berry Buttermilk Sherbet (recipe obtained from Sass and Veracity)
6 oz. or 1 c. fresh raspberries
6 oz. or 1 c. fresh blackberries
6 oz. or 1 c. fresh blueberries
1/2 c. sugar (the original recipe calls for raw; I had no raw sugar so I used standard granulated sugar-I don't know that it made any difference but feel free to use whatever you'd like)
1-3/4 c. buttermilk
1 T. lime juice
1/2 tsp. cardamom (tip: cardamom is incredibly expensive-like $15 expensive. If you don't have it, substitute for 1/4 tsp. each of cinnamon and nutmeg, which is what I did)

Put all three types of berries into a blender and puree. If you decide to remove the seeds, take the berry mixture and force it through a fine mesh sieve to remove them, then add back to the blender. Add the sugar, buttermilk, lime juice, and cardamom (or cardamom substitute) to the blender and puree until smooth. Pour into the container of an electric ice cream maker and run until frozen, but soft enough to spread into a container to place in the freezer (approximately 25 minutes). Seal well in a freezer safe container and freeze for several hours before serving.

Sunday, May 15, 2011

Baked Curried Sweet Potato Fries


Oh, curry and sweet potato. One of the greatest matches I never knew about.

Sweet potato fries are becoming quite popular at restaurants. I love that...now. What's bizarre is that I didn't always love them. They're something I grew into. I held onto my beloved potato for so long until I realized that sweet potatoes were just as good.

Curry was the same way. For a very long time, I hated curry. I hated anything with spice. It made my mouth go on fire, my face would turn purple, and it was pretty uncomfortable for me.

That being said, I've come a long way. I don't know where I decided that curry was good, or for that matter that sweet potatoes were awesome, but I'm really happy I did.

The first time I came across this recipe I was sitting at home, perusing the internet for something easy to have for dinner. I had one sweet potato in the house and a few burgers left over from my Christmas box o' meat. I knew I was going to have a burger and some fries but wasn't sure how to go about it...and then I found a recipe for baked curried sweet potato fries. Seemed awfully simple to me, and I could easily throw this one together while the burger was defrosting and even while on the grill.


And how.


These sweet potato fries had enough spice, enough crunch (even for being baked!) and some really, really good flavor. They were simple, natch. Spice in bowl. Check. egg white in bowl, check. Potato sliced, check. Mixture spread around fries. Check. Bake until you can't stand it anymore. Almost stupidly easy. After I made these for myself I made them for Adam and me for dinner another night, and I had to swat his hand away because he kept snacking at the pan before the rest of the meal was ready. I think he liked them too. :)


I also liked these because although there was oil involved, these fries weren't fried. I can't say they were totally healthy, but I felt somewhat better about eating these fries than ones that came from a deep fryer. Somewhat.

Baked Curried Sweet Potato Fries (recipe obtained from Joy The Baker)

1 medium to large sweet potato, peeled
1 tbsp. olive oil
1 large egg white
1/2 tsp curry powder
1/4 tsp ground cumin
1/4 tsp turmeric
1/4 tsp crushed red pepper flakes (or 1/8 tsp. cayenne pepper, which I've done a few times)
1/2 tsp salt, or to taste

Place a rack in the center of a preheated 400 degree oven.
Line a baking sheet with parchment paper and set aside.
Take the peeled sweet potato and slice into sticks or wedges.
Toss the potato slices with olive oil on the baking sheet. Set aside.
In a medium bowl, whisk egg white until foamy and frothy. Add curry powder, cumin, turmeric, and crushed red pepper flakes and mix until fully combined. Pour the egg white mixture over the potato sticks and toss to coat the potatoes. Using your (clean) hands is likely the best way to do this.
Place in the oven and bake to desired doneness and crispiness, roughly about 40 minutes.
Remove fries from the oven and serve.

Monday, May 2, 2011

Key Lime Mousse

I have no words for this dessert. My mouth is too full of mousse right now to speak.


Key Lime Pie is one of my favorite desserts. I'm not sure where I decided it was full of awesome, but I'm sure as hell glad I did. It's so tart, yet really sweet, and I completely.love.it. There's also key lime meltaways I've made and loved, key lime cheesecake from Cheesecake Factory, and key lime ice cream made by Ben & Jerry's that Adam found for me last summer and surprised me with. Key lime and me, it's pretty much my secret favorite guilty pleasure.

A few weeks ago, I was asked to help with Passover Seder. Not ever having attended a Seder before, and really not knowing what I had to do to prepare the food, I was (understandably) a little intimidated-I wanted to make sure I was following the rules! As it turns out, Key Lime Mousse was pretty easily kosher-eggs, cream, key limes, sugar. Completely stupendous.

Mousse, in general, isn't terribly difficult. But it does have a lot of steps. Zest the fruit. Make the custard. Strain the custard. Cool the custard. Whip the cream. Fold together. Refrigerate. Y'see? Step after step after step.


It is so worth it, though. It's Key lime pie, without the crust (though I imagine some graham cracker crumbles over the top would add some nice crunch). It is unbelievable. If I had more key limes, I'd make it tonight.


Key Lime Mousse (recipe from Epicurious)

*I doubled this recipe to feed 13-the original says it will feed 4. While I'm not certain that all had a lot of the mousse, we did come home with some leftover. I highly recommend leftovers.)

1/2 tbsp grated Key lime zest
1/2 c. fresh Key lime juice
1/2 c. sugar
Pinch of salt
3 large eggs
3/4 stick unsalted butter, cut into small pieces
2/3 c. chilled heavy cream


Whisk together zest, juice, sugar, salt, and eggs in a medium-sized pot. Add butter and cook over medium-low heat, whisking frequently, until thick enough to hold the marks of whisk, about 5 minutes or so. Gently force the mixture through a fine-mesh sieve into a bowl before the eggs scramble, then quick-chill in an ice bath, stirring occasionally, about 5 minutes.
Beat cream with an electric mixer until it holds stiff peaks, then fold into custard gently but thoroughly. Refrigerate at least 2 hours.

Philly-Style pretzels

Let's talk pretzels.

But first, I have a confession: I didn't want to post this recipe. I didn't want anyone to know where it came from, and for that matter, know how easy they actually are to make, but these were too much of a hit to not share. So, here it goes:

I got this recipe from Bobby Flay. From a Throwdown episode, no less.

This past December, I went to Philadelphia to celebrate Christmas with Adam's family. We had a lovely time, playing games, playing with the dogs (and having an unfortunate incident in which they found my Christmas candy, but that's another story for another time. Bottom line, they're none worse for the wear!) and keeping warm and dry from the blizzard going on outside. Before the snow hit though, I got my first taste of Philly pretzel.

It was the kind of pretzel that was chewy all throughout with a little bit of crunch (but only a little!). The Philly-style pretzel got rave reviews from friends (one even admitted that she would get a hot pretzel every morning before school when she lived there). I will go so far as to say that Philadelphia has the best pretzels I have ever eaten.

Fast forward to about a month later, when we were watching Throwdown one evening on the Food Network. We were trying to figure out what to serve for the upcoming superbowl party we were hosting, and it hit us like a ball in the face: we should make pretzels! I was a little wary: I hate making dough. Really, it's true. On the other hand, there was no way we'd get fresh pretzels from Philly that wouldn't taste stale by the time they arrived in Boston. So I thought of an idea that I wish I had thought of a long time ago.


I used my bread maker.


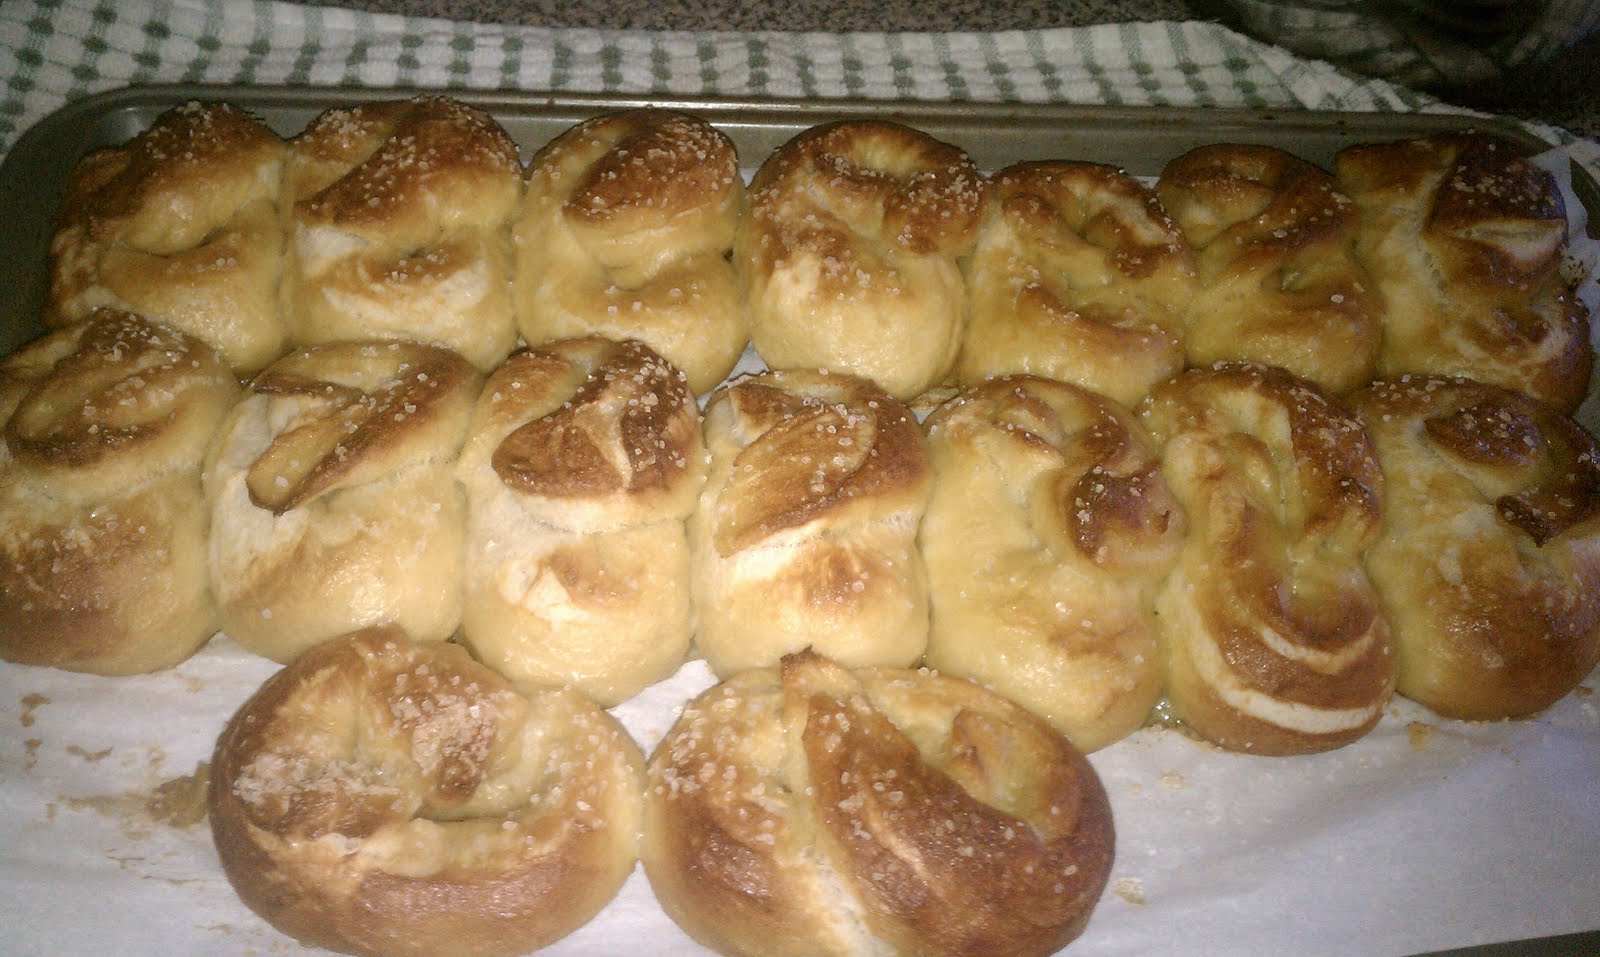
And made, quite possibly, the best pretzels this side of Philly.


It really wasn't that hard: combine the wet ingredients in the bottom of the pan, put the dry ingredients on top, make a well for the yeast, and start the machine. Voila! Dough!

I made these pretzels again this weekend for Adam's birthday dinner with friends. I made the dough, let it rise, formed the pretzels, and boiled and baked them. So. Good. I had Adam taste test one fresh from the oven, and then made him wait until people began arriving last night before he could have another. I had to do it myself. No lie, between the two of us we would have eaten the entire batch. And the next one I made. So to our friends, I say, that was a great exercise in self-restraint for the both of us.

I got to eat the last one today, and I'll be honest, I'm very sad they're gone. I guess that means I'll have to make more.

Soft Pretzels (recipe courtesy of Bobby Flay and the Food Network)

1 1/2 c. warm water
2 tbsp. light brown sugar
1 package active dry yeast (I've used the jarred yeast too, and it just doesn't work as well. Learn from my mistakes, use the packaged yeast. If you must, though, 2 1/4 tsp of yeast from a jar equals one package)
3 Tbsp unsalted butter, melted
2 1/2 tsp. salt
4 3/4 c. all-purpose flour

Combine the water, sugar, yeast, and butter in the bowl of a stand mixer and mix with the dough hook until combined. Let sit for 5 minutes.

Add the salt and flour and mix on low speed until combined. Increase the speed to medium and continue kneading until the dough is smooth and begins to pull away from the side of the bowl, about 3 to 4 minutes. If the dough appears too wet, add additional flour, 1 tablespoon at a time. Remove the dough from the bowl, place on a flat surface and knead into a ball with your hands.

**If you choose to go the bread-maker route, try this method: Combine the wet ingredients (water, butter) in the bottom of the bread machine pan. Then add the flour, sugar, and salt on top. DO NOT MIX TOGETHER. Make a small well in the flour, then put the yeast in. Set your bread machine maker to the dough setting. Then follow the rest of the directions below.

Oil a bowl with vegetable oil (I used olive oil), add the dough and turn to coat with the oil. Cover with a clean towel or plastic wrap and place in a warm spot until the dough doubles in size, about 1 hour. If you need to, the dough can also rise in the fridge overnight.

When you are ready to make the dough, Bring 3 quarts of water (12 cups) to a boil in a pot over high heat and add 3/4 c. baking soda.

Remove the dough from the bowl and place on a flat surface. Divide the dough into 8-16 equal pieces, depending on how big you'd like your pretzels. I did it in 16 pieces, and made pretzels that were about the size of my fist. Roll each piece into a long rope: make the rope into a "U" shape and then cross your hands over each other to pick up the ends, then fold down to the bottom of the "U". Boil the pretzels in the water solution for 30 seconds, splashing the tops with the warmed water using a spoon. Remove with a large flat slotted spatula or spoon. Place pretzels on a baking sheet, press together to make them bake into each other, brush the tops with the egg wash and season liberally with the salt. Place into a preheated 425 degree oven and bake for 15-18 minutes until golden brown.

These are awesome all on their own, straight from the oven, or dipped in some cheese sauce or honey mustard. Yes, please, and thank you.